The job scheduler
Last updated on 2025-12-15 | Edit this page
Overview
Questions
- What is a job scheduler?
- How do I run a program on HPC?
- How do I check on a submitted job or cancel it?
Objectives
- Be able to navigate the filesystem
- Submit a serial job to the scheduler
- Monitor the execution status of jobs (running/waiting/finished/failed)
- Inspect the output and error files from a job
- Find out how long your job took to run and what resources it used
An HPC system might have thousands of nodes and thousands of users. How do we decide who gets what and when? How do we ensure that a task is run with the resources it needs? This job is handled by a special piece of software called the scheduler. On an HPC system, the scheduler manages which jobs run where and when.
We will be using the SLURM scheduler, which is probably the most widely used scheduler for HPC, but many of the concepts we’ll encounter are transferable to other scheduler software you might encounter when using HPC, such as SGE.
Users interact with the scheduler using a jobscript, which is plain text file containing commands to be run, and requests for computing resources e.g. how much time, memory, and CPUs the job can use.
Jobscripts are usually submitted from the scratch
filesystem, because it has more space and reads/writes files more
quickly. Our training cluster doesn’t have a scratch
filesystem, so for this course we’ll work in our home directories
instead.
Submitting a jobscript
The first step we’re going to take towards writing a jobscript is to write a small shell script – essentially a text file containing a list of UNIX commands to be executed in a sequential manner.
We’ll use a command-line text editor called nano to
create this file. This is a fairly intuitive, light weight text editor
that is widely available.
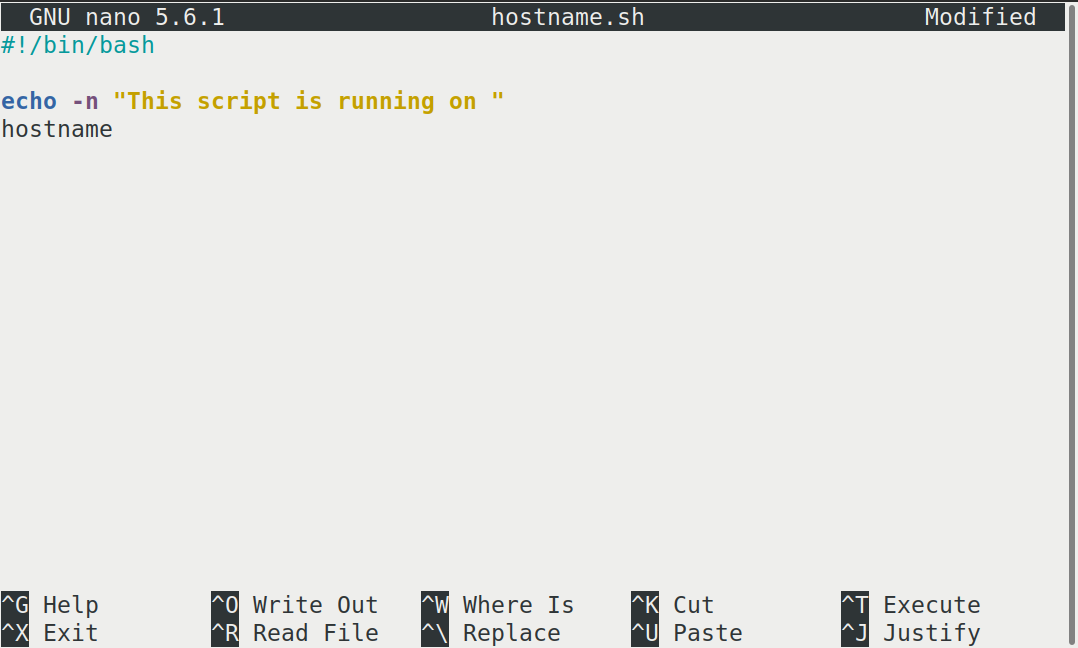
This starts a CLI text editor that looks like this:
Our shell script will have three parts:
- On the very first line, add
#!/bin/bash. The#!(pronounced “hash-bang” or “shebang”) tells the computer what program is meant to process the contents of this file. In this case, we are telling it that the commands that follow are written for the Bash shell. All characters after a#symbol in a shell script are treated as comments (i.e. for information only) and are not executed as commands. Most commonly, comments are written for the benefit of someone reading the script, but the shebang can be thought of as a special type of comment for the computer to read. - Anywhere below the first line, we’ll add an
echocommand with a friendly greeting. When run, the shell script will print whatever comes after echo in the terminal.echo -nwill print everything that follows, without ending the line by printing the new-line character. - On the last line, we’ll invoke the
hostnamecommand, which will print the name of the machine the script is run on.
When finished the file should look like this:
#!/bin/bash

echo -n "This script is running on "
hostname
To close the editor when finished, we use the keyboard shortcuts shown at the bottom of the screen: Ctrl+O to save (Write Out), followed by Return to confirm the file name, and then Ctrl+X to exit.
Mac users also need to use Ctrl rather than CMD.
Ok, so we’ve written a shell script—how do we run it? You might be familiar with other scripting languages such as python, and be familiar with running a python script using something like :
We can do similar with our shell script, and run it using
Challenge
If you haven’t already, run the shell script
hostname.sh. Does it execute on the cluster or just our
login node?
This script ran on the login node, but we want to take advantage of
the compute nodes: we need the scheduler to queue up
hostname.sh to run on a compute node.
To submit a jobscript to the scheduler, we use the SLURM
sbatch command. This creates a job which will run the
script when dispatched to a compute node which the queuing system has
identified as being available to perform the work.
A jobscript should normally contain some SLURM directives to tell the scheduler something about the resources we want available for the job e.g. how many cores to allocate, a time limit, and what type of job this is (e.g. serial, parallel, high memory etc)
Our shell script doesn’t yet contain any of this information for the job scheduler, so we wouldn’t expect it to work.
We can try submitting it anyway—let’s see what happens.
The command we’re going to need is sbatch hostname.sh,
which we could just type out, but there is a shortcut. We’ll
start by typing sbatch h, then press the Tab
key. This will show us a list of possible matches starting with the
letter h, or complete the file name for us if there is only
one match.
This is called tab-completion, and can be used to complete the names of files and directories, in addition to commands. Not only does this make your typing quicker, it also reduces typos because it can only complete file and command names that exist.
OUTPUT
Submitted batch job 340The training cluster we are using has some default settings for SLURM, so our job submitted without errors, but in general, for your job to run correctly, you will need to tell the scheduler which partition to use, how many cores, and specify a time limit for your job. Failure to provide enough information results in an error like the one below:
OUTPUT
sbatch: error: Batch job submission failed: Invalid partition name specifiedThe SLURM partitions are equivalent to job queues for different types of jobs e.g. serial, parallel, GPU, high memory etc that we encountered in the introduction section).
We’ll supply the missing information by editing the jobscript. We
could use tab completion again to speed up typing
nano hostname.sh by using nano h +
Tab, or another shortcut is to use the up arrow key
↑ to cycle through previous commands until we get the one we
want.
BASH
#!/bin/bash
#SBATCH -p compute     # The name of the available partitions varies between clusters
#SBATCH -t 2           # Set a time limit of 2 minutes


echo -n "This script is running on "
hostname
The shebang line must be the first line of the jobscript, so we add
our SLURM directives underneath the initial shebang line, but
above the commands we want to run as our job. The directives start with
#SBATCH and are essentially a special type of
comment which is interpreted by the SLURM software. The first
directive is #SBATCH -p to specify which partition we want
to use. Partitions can be listed using the SLURM command
sinfo, but the cluster documentation will normally explain
when to use each partition. The second directive #SBATCH -t
indicates a time limit for our job.
Now that we have a jobscript with SLURM directives, let’s check that we’ve not made any errors by submitting it to the scheduler again:
We should see something like this that indicates the job has been submitted to the scheduler.
OUTPUT
Submitted batch job 2461232We can check on the status of a running job using the
squeue command.
OUTPUT
JOBID PARTITION NAME USER ST TIME NODES NODELIST(REASON)There are no jobs listed (only the column headings), so we can logically assume that our jobs have either completed successfully, or failed.
Where’s the output from the test job?
When we ran our shell script on the login node, we saw output in the terminal telling us which node the job was running on.
You’ll notice that you don’t see any output printed to the terminal as your jobscript runs. Where does the output go?
Cluster job output is typically redirected to a file in the directory
you submitted it from. Use ls to find and nano
to view the file.
Your output should be in a file called
slurm-[JOB_ID].out. One way to view the contents is with
nano slurm-[JOB-ID].out, or to print the contents in your
terminal, use cat slurm-[JOB-ID].out.
Checking on a job
Check on the status of a submitted job
Edit the hostname.sh script to add a sleep
time of 1 minute. This will give you enough time to check on the job
before it finishes running. Submit the jobscript again, then run
squeue to view the status of the submitted job.
Your test jobscript should look like this:
The output from squeue will look a bit like this:
OUTPUT
JOBID PARTITION     NAME     USER ST       TIME  NODES NODELIST(REASON)
  173   compute hostname username  R       0:02      1 compute01
We’ve already encountered some of the column headings such as the job
ID, and SLURM partition, and we can reasonably expect NAME
to refer to the name of the job (defaults to the jobscript file name if
you’ve not explicitly given a name).
ST means status and displays the job state
code. Common codes include R for running,
CA for cancelled, CD for completed,
PD for pending (waiting for resources), and F
for failed.
TIME refers to how long the job has been running for,
NODES shows how many nodes the job is running on, and
NODELIST lists the nodes the job is running on. If it
hasn’t started yet, a reason is given in brackets such as
(Priority) meaning that other users have higher priority,
or (Resources) which means that resources are not currently
available for your job.
Cancel a running job
Sometimes you’ll realise there is a problem with your job soon after submitting it.
In this scenario it is usually preferable to cancel the job rather than let it complete with errors, or produce output that is incorrect. It is also less wasteful of resources.
Resubmit your hostname.sh jobscript. View the status
(and job ids) of your running jobs using squeue
(JOBID is the first column).
Make a note of the job id of your hostname.sh then
cancel the job using
before it finishes.
Verify that the job was cancelled by looking at the job’s log file,
slurm-[job-id].out.
Your output should look similar to this:
yourUsername@login:~$ sbatch hostname.sh
Submitted batch job 332
yourUsername@login:~$ squeue
             JOBID PARTITION     NAME     USER ST       TIME  NODES NODELIST(REASON)
               332   compute hostname username  R       0:02      1 compute01
yourUsername@login:~$ scancel 332
yourUsername@login:~$ cat slurm-332.out
This script is running on compute01
slurmstepd-compute01: error: *** JOB 332 ON compute01 CANCELLED AT 2025-10-13T12:53:19 ***
Check the status of a completed job
squeue shows jobs that are running or waiting to run,
but to view all jobs including those that have finished or failed, we
need to use sacct.
Run sacct now to view all the jobs you have submitted so
far.
Running sacct shows the job ID and some statistics about
your jobs.
For now we are most interested in the State column—the examples so far in the course should result in at least one job with each of the states “COMPLETED”, “CANCELLED”, and “TIMEOUT”.
Other statuses you might see include “RUNNING”, “PENDING”, or “OUT_OF_MEMORY”.
OUTPUT
       JobID    JobName  Partition    Account  AllocCPUS      State ExitCode
------------ ---------- ---------- ---------- ---------- ---------- --------
330          hostname.+    compute     (null)          0  COMPLETED      0:0
331          hostname.+    compute     (null)          0    TIMEOUT      0:0
332          hostname.+    compute     (null)          0  CANCELLED      0:0
Resource requests
Resource requests (e.g. time limit, number of CPUs, memory) are typically binding. If you exceed them, your job will be killed i.e. automatically cancelled by the scheduler. Let’s use wall time as an example. We will request 1 minute of wall time, and attempt to run a job for two minutes.
Let’s edit the third and 5th line of the jobscript to make these changes:
BASH
#!/bin/bash
#SBATCH -p compute     # The name of the available partitions varies between clusters
#SBATCH -t 1           # Set a time limit of 1 minute

sleep 120              # time in seconds
echo -n "This script is running on "
hostname
and resubmit the jobscript and wait for it to finish:
We can then view the status of the job using sacct — the
most recent job should have the status of “TIMEOUT”. Something like
this:
BASH
yourUsername@login:~$ sacct
       JobID    JobName  Partition    Account  AllocCPUS      State ExitCode
------------ ---------- ---------- ---------- ---------- ---------- --------
102          hostname.+    compute     (null)          0    TIMEOUT      0:0
We can also check the log file by printing it using
cat:
BASH
yourUsername@login:~$ cat slurm-[JobID].out
This script is running on compute01
slurmstepd-compute01: error: *** JOB 178 ON compute01 CANCELLED AT 2025-10-09T10:14:17 DUE TO TIME LIMIT ***
Our job was killed for exceeding the amount of resources it requested. Although this appears harsh, this is actually a good feature. Strict adherence to resource requests allows the scheduler to find the best possible place for your jobs. Even more importantly, it ensures that another user cannot use more resources than they’ve been given. If another user messes up and accidentally attempts to use all of the cores or memory on a node, Slurm will either restrain their job to the requested resources or kill the job outright. Other jobs on the node will be unaffected. This means that one user cannot mess up the experience of others – the only jobs affected by a mistake in scheduling will be their own.
It is a good idea to request slightly more resources than you expect
to need. If you request a lot more (e.g. time) than your job needs it
will likely sit in the scheduler queue for longer. You can get some idea
of the likely resources required from previous, similar jobs you have
submitted—sacct usually outputs more details than on our
training cluster.
Time formats
We have previously used the -t 2 option to request 2
minutes. There are multiple acceptable formats
possible to specify the time limit: “minutes”, “minutes:seconds”,
“hours:minutes:seconds”, “days-hours”, “days-hours:minutes” and
“days-hours:minutes:seconds”.
Interactive jobs
Most of the work done on HPC tends to be batch jobs, where you submit your jobscript to the scheduler and you have no further interaction with it while it runs.
Sometimes you need to run a task interactively e.g. using a GUI, or perhaps you’re debugging a failed job, or testing a small example before submitting a batch job.
These are typically not suitable tasks to run on the login node as they’re too resource-intensive, so usually there is an interactive partition which will enable you to use a compute node directly for a limited time period.
The details vary between HPC clusters, but will use some variation on
the srun command. Check the documentation for your HPC
cluster to find out how to do this.
- A jobscript is a shell script containing SLURM commands in addition to the commands you want to run
- Submit your jobscript using
sbatch - Run your jobs from the “scratch” filesystem
- Request slightly more resources than you will need